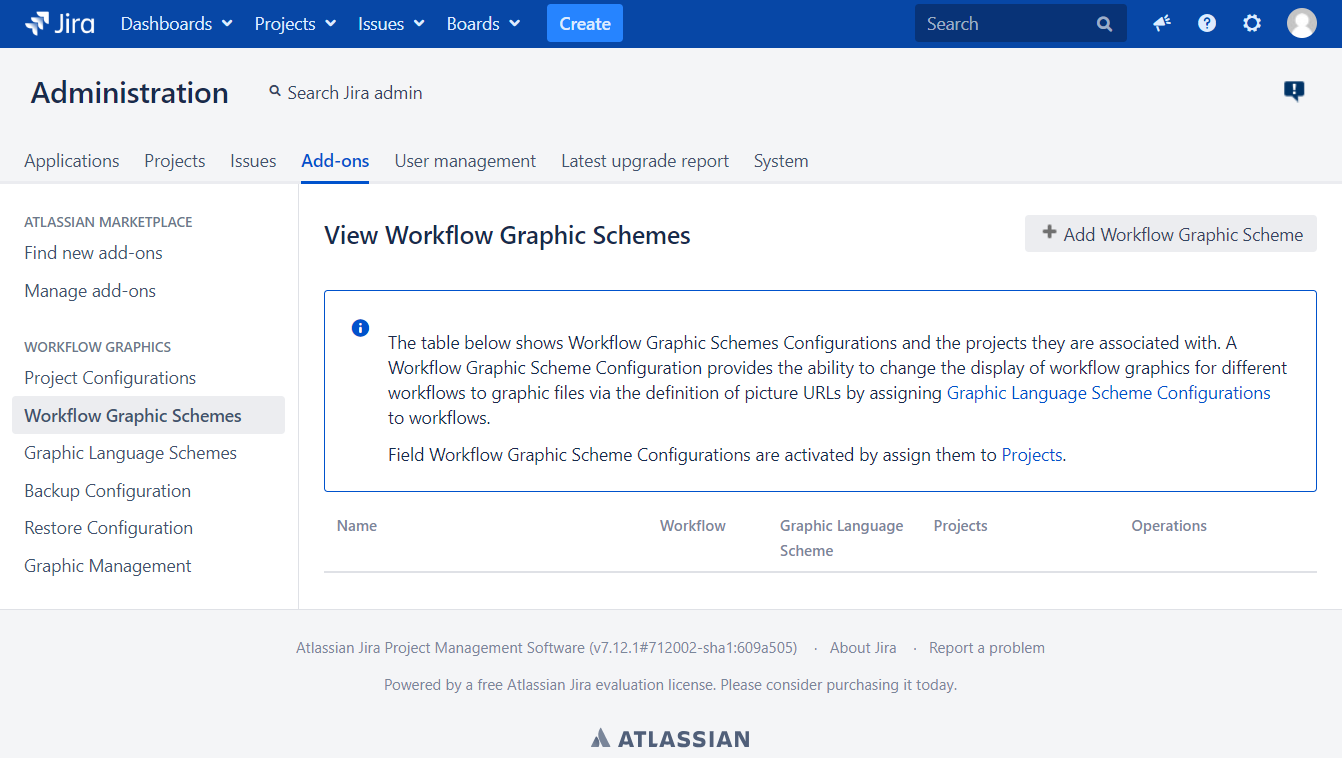
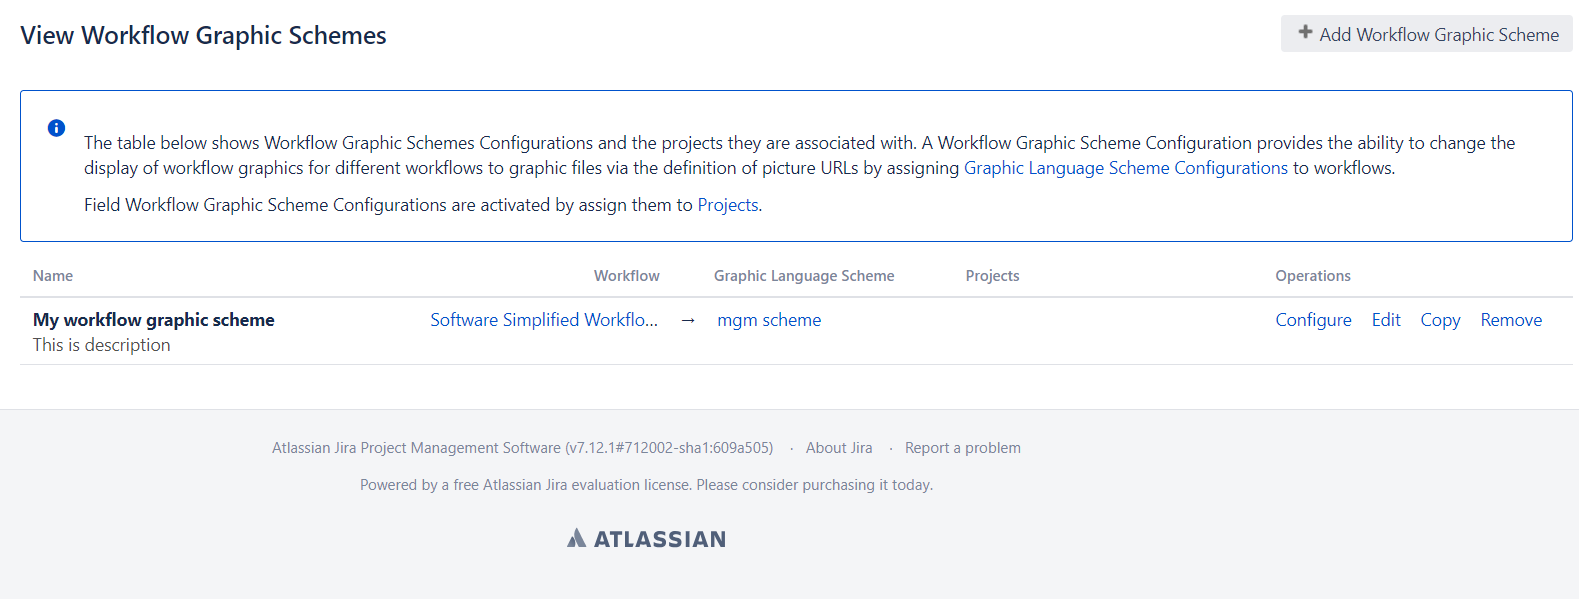
On the left navigation, under WORKFLOW GRAPHICS section, select Workflow Graphic Schemes to go to the View Workflow Graphic Schemes page
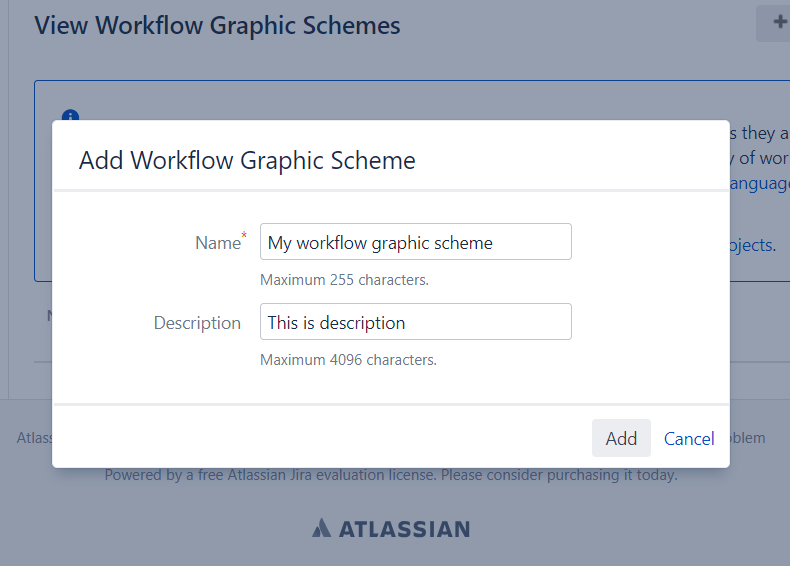
Click on the button
On the Add Workflow Graphic Scheme popup window, enter name (required) and description of your scheme. Then click Add. Once the creation successfully, you will be redirected to Configuration Workflow Graphic Scheme page, with your scheme name on the title
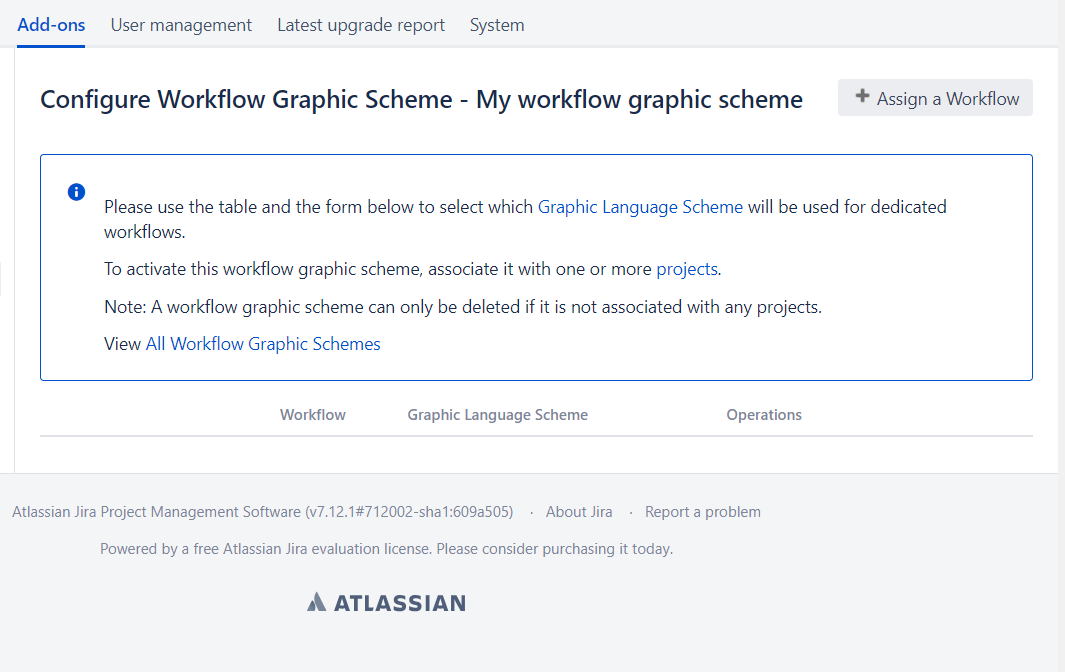
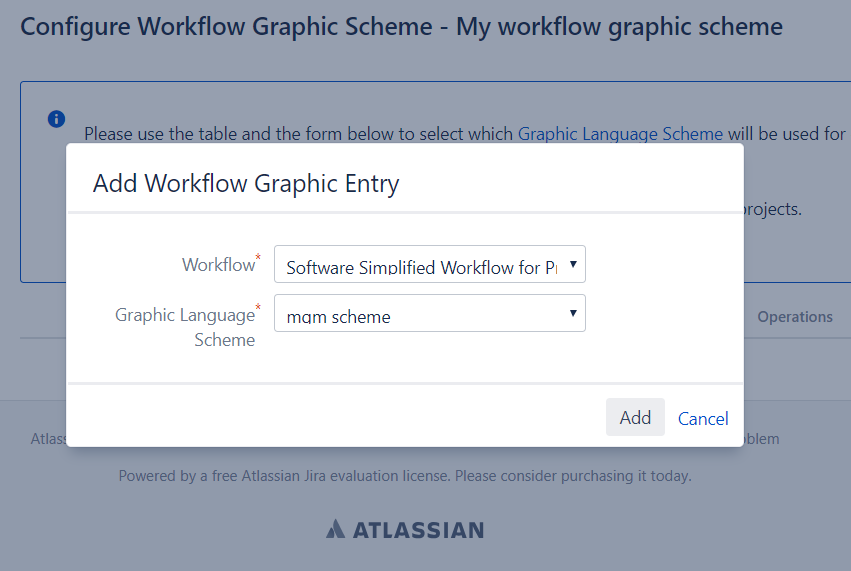
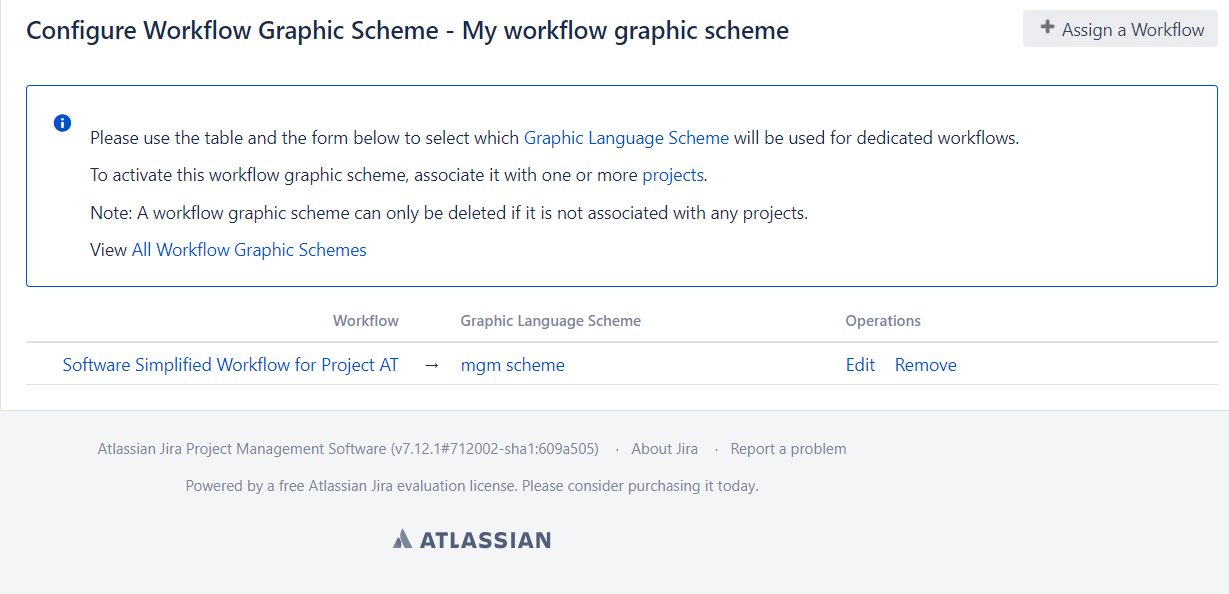
Click on the to map your Graphic Language Scheme with any standard Jira Workflow. In the popup window, choose the Jira workflow that you want to be replaced by your Graphic Language Scheme then click Add.
If it is successful, the popup will disappear, and you will see a new config added to the list.
To go back to View Workflow Graphic Schemes page, click again on Workflow Graphic Schemes on the left navigation. Your scheme should be placed in the list now.
You are done with the configuration of workflow graphic scheme and can use it in your project. The next step is to associate this workflow graphic scheme with your project.
JavaScript errors detected
Please note, these errors can depend on your browser setup.
If this problem persists, please contact our support.